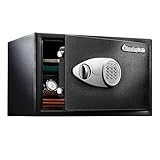
A home fireproof safe is an incredible asset for all homeowners. It gives you the ability to easily keep all of your valuables safe in one location.
It is basically a secure box that is manufactured out of either metal or steel. It is designed to withstand fire and deter burglars. But before it can be used, it must first be properly installed.
With this short guide we will break down the step by step process for installing a home fireproof safe. But first, let’s talk about the tools you will need.
Tools Needed To Install a Safe
Luckily there are only 5 tools needed to get the job done. Many of which you may already have in your garage.
- Drill along with drill bits
- Socket set
- Screwdrivers
- Marker pen
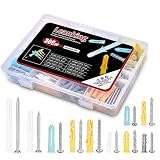
- Fixing gear for the safe (this usually comes with the safe)
How To Install a Home Fireproof Safe (Step By Step Guide)
Please understand there are many different types of safes and each one will be installed a little differently. With this step by step guide we are going to break down the basics of installing a free standing home safe.
No matter what kind of safe you will be installing, please make sure you follow the instructions that are included with the safe.
Step 1 – Select The Best Location
Location is everything when it comes to installing your home fireproof safe. You should never install a safe in a location that gets a lot of traffic. That opens you up to someone breaking in and knowing the exact location of your safe.
The goal is to install the safe in a location that is hidden from view. A closet is a great location as usually only you and your family will go in the closet.
For an extra layer of protection, installing a safe under the floor is a great option.
Step 2 – Check For Potential Problems
Once you decide where you will install your safe, you will want to go over a quick checklist to make sure there are no potential problems.
First and foremost make sure the location can support the weight of the safe. Ideally, you will want there to be solid joists that run underneath the floor.
Will you be able to easily access the safe on a regular basis? Is it in a position where it will not easily fall over? Make sure the surface is always leveled off. You should also check the manufacturer’s manual for any suggestions they may have.
Step 3 – Prepare The Area
Once you are sure there are no potential problems in your chosen location, the next step is to prepare the area for the installation. Anything that is not a necessity should be cleared away.
If you will be placing your safe against a wall, be sure to remove the skirting board. This way the safe can sit seamlessly up against the wall.
The easiest way to do this is to place the safe against the wall and use a pencil to mark the board. You can then remove the board, cut it down to size, and then reattach it.
If there is carpet, it will also need to be removed. This can be done by placing the safe in the chosen location and using a knife to cut around the edges. Working on the floor directly will make it a lot easier to fit the bolts.
Step 4 – Drill The Holes
Now it’s time to really get down to business. Before you start to drill, take a few minutes to mark the spots. The easiest way to do this is to place the safe in its proper position and make a mark through the existing drill holes.
Start with a small masonry bit and then widen it with a larger one. This will make the drilling process a little easier.
So that you can avoid drilling the holes too deep, measure the bolts before you start drilling. You should also make sure all of the holes go straight downward.
Step 5 – Align The Safe
The final step is to align the safe over the holes you just drilled. Once the safe is properly aligned, insert the expansion bolts into the holes. Depending on the type of bolts you are using, you will need to use either a spanner or screwdriver to tighten them.
As you tighten the bolts, they will expand. This ensures you get the tightest possible fit. Before fully tightening the bolts, check to see that the safe is sitting in the proper position, and that it opens correctly.
If everything is as it should be, you can then tighten the bolts all the way in. Once the safe has been properly installed, you can then insert any shelves you would like to have in your safe.
Step 6 – Add Your Valuables
Now that the safe has been installed, you can start placing your valuables in it. Make sure your safe is locked at all times and never tell anyone its location.